
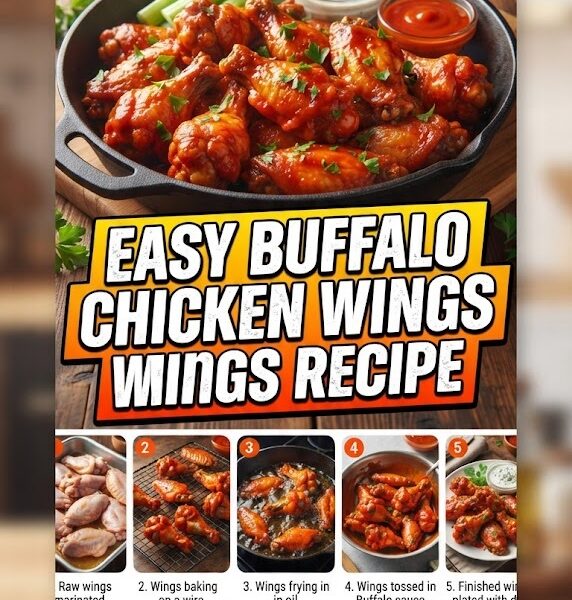
There is perhaps no appetizer more iconic in the American culinary landscape than the Buffalo chicken wing. Whether it’s a high-stakes Super Bowl Sunday, a casual backyard barbecue, or a late-night craving at a local dive bar, the Buffalo wing reigns supreme. Its perfect trifecta of crispy skin, juicy meat, and a tangy, buttery sauce that clears the sinuses just enough is a sensory experience unlike any other.
But you don’t have to head to a sports bar to get restaurant-quality wings. In fact, making them at home allows for a level of customization—extra crispy skin, adjusted heat levels, and high-quality ingredients—that commercial kitchens often overlook. This guide is your masterclass in the art of the Buffalo wing. We will explore the history, the science of the crunch, the secrets of the sauce, and three foolproof cooking methods to ensure you serve the best wings of your life.
The History of the Buffalo Wing: From Scraps to Stardom
Before we dive into the “how-to,” it’s worth appreciating where this dish came from. Legend has it that the Buffalo wing was born in 1964 at the Anchor Bar in Buffalo, New York. Teressa Bellissimo, the co-owner, faced a dilemma when a shipment of chicken wings arrived instead of the backs and necks usually used for soup. To avoid waste, she fried the wings, tossed them in a spicy cayenne-based sauce, and served them with blue cheese and celery—the only sides she had on hand.
What started as a resourceful snack quickly became a regional sensation and eventually a global phenomenon. Today, Americans consume billions of wings annually, particularly during major sporting events. The beauty of the Buffalo wing lies in its simplicity, but as any connoisseur knows, the devil is in the details.
Choosing Your Chicken: Drumettes vs. Flats
When you buy a pack of chicken wings, they usually come “whole.” To make authentic Buffalo wings, you’ll need to separate them into three parts: the drumette, the flat (or wingette), and the tip.
- The Drumette: This part looks like a miniature drumstick. It has more meat and a central bone. It’s often the favorite for those who prefer a higher meat-to-skin ratio.
- The Flat: This is the middle section with two parallel bones. Fans of the flat argue that the skin-to-meat ratio is superior, and the meat itself tends to be more tender.
- The Tip: This is the pointy end. There is almost no meat here. Save these in your freezer to make a rich chicken stock later; do not include them in your frying or baking.
Pro Tip: Always look for “Air-Chilled” chicken. Most commercial chicken is water-chilled, meaning the skin absorbs extra moisture. Air-chilled chicken has drier skin from the start, which is the first secret to achieving maximum crispiness.
The Science of the Crunch: How to Get Crispy Wings at Home
The biggest challenge home cooks face is soggy skin. Whether you are frying or baking, the goal is to render out the fat beneath the skin while dehydrating the surface to create a crackly, golden-brown crust.
The Drying Phase
If you take wings straight from the package and put them in the oven or fryer, the steam trapped in the skin will prevent it from getting crispy. To combat this:
- Pat them dry: Use paper towels to remove every drop of surface moisture.
- The Fridge Method: Place the wings on a wire rack over a baking sheet and leave them uncovered in the refrigerator for 4 to 24 hours. The cold, circulating air will dry out the skin perfectly.
The Baking Powder Secret
If you are baking your wings, this is the ultimate “cheat code.” Tossing your dried wings in a mixture of salt and aluminum-free baking powder (not baking soda) changes the pH level of the skin. This helps break down the proteins and creates tiny bubbles on the surface, increasing the surface area and resulting in a texture that mimics deep-frying.
The Master Recipe: Easy Buffalo Chicken Wings (3 Methods)
Regardless of the cooking method you choose, the preparation remains the same. Here is what you will need for 2-3 pounds of chicken wings.
Ingredients
- 2-3 lbs Chicken Wings: Split into flats and drumettes.
- 1 tbsp Baking Powder: (Only if baking or air-frying; skip for deep-frying).
- 1 tsp Salt: To taste.
- 1/2 tsp Garlic Powder: For a base layer of flavor.
- 1/2 tsp Black Pepper: Freshly cracked.
Method 1: The Classic Deep-Fry
This is the gold standard for texture.
- Heat the Oil: Fill a heavy pot or deep fryer with neutral oil (canola, peanut, or vegetable) and heat to 375°F (190°C).
- Fry in Batches: Carefully lower the wings into the oil. Do not overcrowd the pot, or the temperature will drop, resulting in greasy wings.
- Cook: Fry for 10–12 minutes until golden brown and floating.
- Drain: Place on a wire rack or paper towels for 1-2 minutes before tossing in sauce.
Method 2: The Crispy Oven-Baked Method
Ideal for large batches and easier cleanup.
- Preheat: Set your oven to 425°F (220°C).
- The Coating: Toss the dried wings with baking powder, salt, garlic powder, and pepper.
- Arrange: Place wings on a wire rack set over a baking sheet. This allows heat to circulate under the wings.
- Bake: Cook for 45–50 minutes, flipping halfway through. The wings are done when the skin is blistered and dark golden.
Method 3: The Air Fryer Method
The fastest and most energy-efficient way to get crispy results.
- Preheat: Set the air fryer to 400°F (200°C).
- Coat: Use the same baking powder/salt mixture as the oven method.
- Air Fry: Place wings in the basket in a single layer.
- Shake: Cook for 20 minutes, shaking the basket every 5–7 minutes to ensure even browning.
The Secret Sauce: Crafting the Perfect Buffalo Glaze
The sauce is what defines the “Buffalo” experience. It is not just hot sauce; it is an emulsion of vinegar-based heat and rich, silky fat.
The Essential Ingredients
- 1/2 cup Frank’s RedHot Original: Accept no substitutes if you want the “authentic” flavor. Frank’s has the specific vinegar and cayenne balance required.
- 1/3 cup Unsalted Butter: This mellows the heat and adds a velvety texture.
- 1 tbsp White Vinegar: For an extra zing.
- 1/4 tsp Worcestershire Sauce: For depth and umami.
- 1/4 tsp Garlic Powder: To round out the spice.
- A dash of Cayenne Pepper: (Optional) If you want “Extra Hot” wings.
Instructions
- Melt: In a small saucepan over low heat, melt the butter.
- Whisk: Add the hot sauce, vinegar, Worcestershire, and garlic powder.
- Emulsify: Whisk constantly until the sauce is smooth and unified. Do not let it boil vigorously, or the butter may separate.
- The Toss: Place your hot, crispy wings in a large metal bowl. Pour the sauce over them and toss vigorously until every nook and cranny is coated.
The Accompaniments: Dips and Sides
A Buffalo wing is never a solo act. To balance the heat and acidity, you need the cooling contrast of dairy and the crunch of fresh vegetables.
Homemade Chunky Blue Cheese Dressing
Don’t settle for the bottled stuff. This takes five minutes and elevates the meal significantly.
- 1/2 cup Sour Cream
- 1/4 cup Mayonnaise
- 1/4 cup Crumbled Blue Cheese (Gorgonzola or Roquefort work well)
- 1 tbsp Fresh Lemon Juice
- 1 clove Garlic, minced
- Salt and Pepper to taste
Mix all ingredients in a bowl, mashing some of the blue cheese crumbles with a fork to release their flavor into the base. Let it sit in the fridge for at least 30 minutes before serving.
The Veggie Cru: Celery and Carrots
Cut fresh celery and carrots into 4-inch sticks. For an extra professional touch, soak the sticks in ice water for 15 minutes before serving to make them ultra-crispy and “snappy.”
Common Mistakes and How to Avoid Them
Even with a simple recipe, things can go wrong. Here are the most frequent pitfalls:
- Tossing Wings Too Early: Never toss wings in sauce until you are ready to eat. The longer they sit in the sauce, the more the moisture penetrates the skin, turning it from crispy to rubbery.
- Using Cold Butter: When making the sauce, if you drop cold butter into hot sauce, it won’t emulsify properly. Start with room-temperature butter and melt it slowly.
- Crowding the Pan: Whether frying or baking, wings need “personal space.” If they touch, they will steam instead of crisp.
- Using “Buffalo Sauce” from a Bottle: While convenient, many pre-bottled Buffalo sauces use soybean oil instead of real butter. The flavor and mouthfeel will never be as good as the real thing.
Elevating Your Wing Game: Creative Variations
Once you have mastered the classic Buffalo wing, you can use the same cooking techniques to experiment with other flavor profiles.
- Honey Buffalo: Add 2 tablespoons of honey to the standard sauce recipe for a “sweet and spicy” kick that is incredibly popular.
- Garlic Parmesan Buffalo: Add 1 tablespoon of freshly minced garlic and 1/4 cup of finely grated parmesan cheese to the sauce.
- Lemon Pepper Buffalo: Toss the wings in a lemon-pepper dry rub before cooking, then toss in the Buffalo sauce afterward for a bright, citrusy zing.
- Korean Buffalo: Replace the hot sauce with Gochujang (Korean chili paste) and add a dash of sesame oil and soy sauce.
The Art of Serving: Presentation Matters
When serving Buffalo wings, use a large platter. Pile the wings high in the center to retain heat. Place the bowl of blue cheese dressing on one side and the celery/carrot sticks on the other.
Have plenty of napkins—or better yet, wet wipes—available. Part of the joy of eating wings is the messy, hands-on nature of the meal. In Buffalo, it’s often said that if you don’t have sauce on your face and fingers, you’re doing it wrong.
Pairings: What to Drink with Buffalo Wings
The high acidity and spice of the wings require a drink that can either cut through the fat or soothe the heat.
- Beer: A crisp, cold Lager or a hoppy IPA is the traditional choice. The carbonation cleanses the palate, while the hops can actually enhance the spice.
- Soda: A classic Mexican Coke (made with cane sugar) or a spicy Ginger Ale provides a sweet counterpoint to the vinegar in the sauce.
- Wine: If you’re feeling fancy, a slightly off-dry Riesling or a sparkling Prosecco works surprisingly well to balance the heat.
Storage and Reheating: Keep the Crunch
If you somehow have leftovers, do not microwave them. Microwaving wings results in rubbery skin and dry meat.
To Reheat:
- Preheat your oven or air fryer to 350°F (175°C).
- Place the wings on a rack.
- Heat for 5–8 minutes until the skin sizzles again.
- If they look a little dry, toss them in a fresh teaspoon of melted butter and hot sauce to revive the glaze.
Why This Recipe Works
This recipe is designed for the modern American home cook. By focusing on moisture management and emulsification, we bridge the gap between amateur cooking and professional results. The use of the baking powder technique (for non-fried versions) is a game-changer that has been vetted by food scientists and culinary enthusiasts alike.
Making the perfect Buffalo wing is a rite of passage. It’s about more than just food; it’s about the atmosphere, the shared experience, and the pursuit of that perfect, spicy bite. Whether you’re a “flat” fan or a “drumette” devotee, this easy Buffalo chicken wing recipe ensures that your next batch will be the talk of the town.
Frequently Asked Questions
Can I make these wings gluten-free?
Yes! The core ingredients—chicken, butter, and Frank’s RedHot—are naturally gluten-free. Just ensure your baking powder is labeled gluten-free if you are using that method. Avoid any recipes that call for dusting the wings in flour.
How do I make the wings “Suicide Hot”?
To increase the heat without ruining the flavor balance, add a few drops of a habanero or ghost pepper extract to your sauce. You can also add crushed red pepper flakes or finely minced fresh jalapeños for a more textured heat.
Can I use frozen wings?
You can, but they must be completely thawed and then thoroughly dried. Frozen wings often have a higher water content, so the “Fridge Drying Method” mentioned earlier is even more critical for frozen-to-thawed chicken.
Why is Frank’s RedHot the standard?
While you can use other hot sauces like Texas Pete or Crystal, Buffalo purists insist on Frank’s because it has a specific ratio of distilled vinegar to aged cayenne peppers that provides the “tang” associated with the original 1964 recipe. Other sauces may be too salty or too thick.
Is it better to bake or air fry?
If you are cooking for a crowd (more than 4 people), the oven is better because you can fit 40–50 wings at once. If you are cooking for 1–2 people, the air fryer is faster and produces a slightly better “crunch” in less time.
Conclusion: Your Journey to Wing Mastery
Mastering the Buffalo wing is a rewarding endeavor. It’s a dish that brings people together and satisfies a very specific, primal craving for salt, fat, and heat. By following the steps outlined in this guide—prioritizing dry skin, using real butter, and choosing the right sauce—you are no longer just making a snack; you are creating a culinary masterpiece.
So, fire up the oven, heat the oil, or plug in the air fryer. The perfect plate of Buffalo wings is just minutes away. Grab the blue cheese, slice the celery, and get ready for a flavor explosion that pays homage to the streets of Buffalo, New York, right in your own kitchen. Enjoy the crunch, embrace the spice, and most importantly, enjoy the process of becoming a wing expert.