
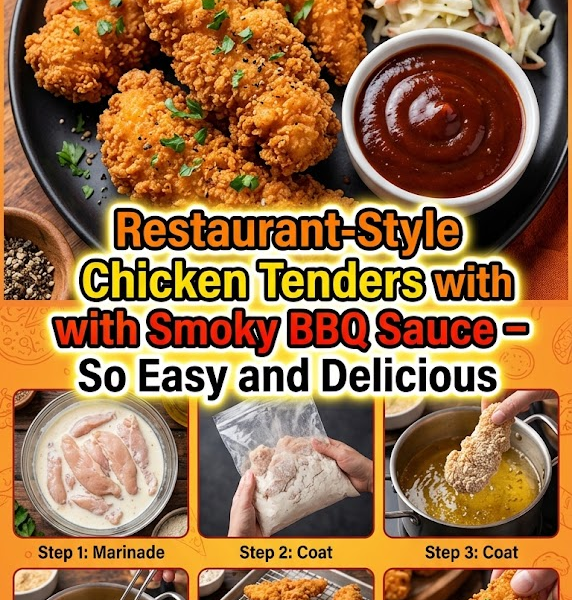
There is a universal truth in the culinary world: everyone loves a perfect chicken tender. Whether you are five years old or fifty, the combination of a shattering, golden-brown crust and juicy, seasoned meat is irresistible. But all too often, homemade versions fall short. They can be soggy, bland, or—worst of all—dry and rubbery.
If you’ve ever wondered why the chicken tenders at your favorite upscale pub or Southern kitchen taste so much better than the ones from a freezer bag, you’ve come to the right place. Achieving that restaurant-quality result at home isn’t about professional equipment; it’s about technique, chemistry, and flavor layering.
In this comprehensive guide, we are going to deconstruct the chicken tender from the inside out. We will explore the science of the brine, the secrets of the double-dredge, the mechanics of frying, and the recipe for a Smoky BBQ Sauce so good you’ll want to put it on everything.
The Anatomy of the Perfect Chicken Tender
What makes a “restaurant-style” tender? It comes down to three pillars:
- The Texture of the Meat: It must be succulent and tender enough to pull apart with ease.
- The Crunch Factor: The coating should be thick, craggy, and stay crispy even after it cools slightly.
- The Flavor Profile: The chicken itself must be seasoned, not just the breading.
Choosing the Right Cut
Most people assume chicken tenders are just sliced chicken breasts. While you can use sliced breasts, true restaurant-style tenders use the chicken tenderloin. This is a specific strip of meat located on the underside of the breast. It is naturally more tender because it is a muscle that isn’t used as much by the bird.
If you are using breast meat, always slice against the grain. This shortens the muscle fibers, making the meat feel more tender when you bite into it.
The Secret Weapon: The Buttermilk Brine
The biggest mistake home cooks make is going straight from the package to the flour. Restaurants almost always use a brine.
Why Buttermilk?
Buttermilk is slightly acidic. This mild acidity helps break down the protein structures in the chicken without making it mushy. Furthermore, the thick consistency of buttermilk helps the flour adhere to the meat later on.
The “Flavor Injection” Brine
To elevate your tenders, don’t just use plain buttermilk. Create a flavor bath.
- Buttermilk: The base.
- Pickle Juice: A secret used by famous fast-food chains. the vinegar and salt provide deep seasoning.
- Hot Sauce: Not enough to make it spicy, but enough to add “back-end” depth.
- Spices: Garlic powder, onion powder, and smoked paprika should go directly into the liquid.
Pro Tip: Let your chicken marinate for at least 4 hours, but ideally overnight. This ensures the seasoning penetrates all the way to the center of the meat.
The Master Recipe: Restaurant-Style Chicken Tenders
Ingredients
For the Chicken & Brine:
- 2 lbs Chicken Tenderloins (tendons removed)
- 2 cups Buttermilk
- 1/4 cup Dill Pickle Juice
- 1 tbsp Hot Sauce (Louisiana style)
- 1 tsp Salt
- 1 tsp Black Pepper
For the Breading (The Dredge):
- 2 cups All-Purpose Flour
- 1/2 cup Cornstarch (The secret to extra crunch!)
- 1 tbsp Smoked Paprika
- 1 tbsp Garlic Powder
- 1 tbsp Onion Powder
- 1 tsp Cayenne Pepper (optional for heat)
- 2 tsp Salt
- 1 tsp Black Pepper
For the Smoky BBQ Sauce:
- 1 cup Ketchup
- 1/4 cup Apple Cider Vinegar
- 1/4 cup Brown Sugar (packed)
- 2 tbsp Molasses
- 1 tbsp Worcestershire Sauce
- 1 tsp Liquid Smoke (Hickory or Mesquite)
- 1 tsp Smoked Paprika
- 1/2 tsp Garlic Powder
- 1/4 tsp Ground Black Pepper
Step-by-Step Instructions
1. Preparing the Chicken
Start by cleaning your chicken tenderloins. Many tenderloins come with a tough white tendon sticking out of the top. To remove it, hold the tip of the tendon with a paper towel (for grip) and use a fork to push the meat down and away from the tendon.
Place the chicken in a large bowl or a heavy-duty Ziploc bag. Whisk together the buttermilk, pickle juice, hot sauce, salt, and pepper. Pour it over the chicken, seal it, and refrigerate.
2. Creating the Smoky BBQ Sauce
While the chicken marinating, make the sauce so the flavors have time to meld.
- In a small saucepan over medium heat, combine all the BBQ sauce ingredients.
- Whisk until the sugar is dissolved and the sauce begins to simmer.
- Reduce heat to low and let it thicken for about 10–15 minutes, stirring occasionally.
- Remove from heat and let it cool. It will thicken further as it cools.
3. The Dredging Station
This is where the magic happens. In a wide, shallow dish, whisk together the flour, cornstarch, and all the dry spices.
The Pro Technique: Before you start dipping the chicken, take 2–3 tablespoons of the buttermilk brine and drizzle it into the flour mixture. Use a fork to toss it around. This creates small “clumps” of flour. When these clumps stick to the chicken, they turn into those extra-crispy, craggy bits found on professional fried chicken.
4. The Coating Process
Use the “Dry Hand/Wet Hand” method to avoid “club hand” (where your fingers get coated in thick batter).
- Lift a piece of chicken from the brine with your “wet hand.”
- Drop it into the flour mixture.
- With your “dry hand,” scoop flour over the chicken and press down firmly. Pressing is crucial—it ensures the coating sticks and creates texture.
- Shake off the excess and place the coated tender on a wire rack.
Important: Let the breaded chicken rest on the rack for 10 minutes before frying. This allows the flour to hydrate and “set,” which prevents the breading from falling off in the oil.
5. The Art of Frying
You don’t need a deep fryer. A heavy-bottomed cast-iron skillet or a Dutch oven works perfectly.
- Fill the pot with about 2 inches of neutral oil (Peanut, Canola, or Vegetable oil).
- Heat the oil to 350°F (175°C). Use a clip-on thermometer; temperature control is the difference between greasy chicken and perfect chicken.
- Fry the tenders in batches. Do not crowd the pan, or the oil temperature will drop, resulting in soggy breading.
- Fry for 3–4 minutes per side until the internal temperature reaches 165°F and the outside is deep golden brown.
6. The Cooling Phase
Never place fried chicken directly onto paper towels. This traps steam under the chicken, which softens the bottom crust. Instead, place them on a clean wire cooling rack set over a baking sheet. This allows air to circulate around the entire tender, keeping it crisp.
The Science of the “Crunch”: Why Cornstarch Matters
In the recipe above, we used a mix of flour and cornstarch. Why? Flour contains gluten, which can become chewy when cooked. Cornstarch is a pure starch that prevents gluten development and absorbs moisture more effectively. When fried, cornstarch creates a glass-like, brittle structure that stays crispy much longer than flour alone.
Alternative Cooking Methods
The Air Fryer Method
If you want to save on calories without sacrificing too much texture, the air fryer is a great tool.
- Follow the breading instructions as usual.
- Preheat your air fryer to 400°F.
- Crucial Step: Generously spray the breaded tenders with an oil mister (like avocado or olive oil spray). If there is dry flour visible, it will stay dry and chalky in an air fryer.
- Cook for 6 minutes, flip, spray again, and cook for another 5–6 minutes.
The Oven-Baked Method
To get a “fried” look in the oven:
- Toast your breading mixture (or panko) in a pan with a little oil before coating the chicken. This ensures a golden color.
- Bake at 425°F on a wire rack for 15–20 minutes.
Elevating the Flavor: Variations to Try
Once you master the base recipe, you can experiment with these restaurant-inspired variations:
1. Nashville Hot Tenders
After frying, whisk together 1/2 cup of the hot frying oil with 2 tbsp cayenne pepper, 1 tbsp brown sugar, and 1 tsp chili powder. Brush this spicy oil over the hot chicken tenders. Serve with white bread and extra pickles.
2. Honey Garlic Glaze
Instead of BBQ sauce, toss your finished tenders in a mixture of honey, soy sauce, grated ginger, and minced garlic that has been simmered into a thick syrup.
3. The “Everything” Bagel Crust
Add 2 tablespoons of everything bagel seasoning to your flour dredge. The sesame seeds and dried onion add an incredible savory crunch.
Troubleshooting Common Issues
“The breading fell off my chicken!”
This usually happens for two reasons:
- The chicken was too wet when it hit the flour. Make sure to shake off excess brine.
- You didn’t let the breaded chicken rest. That 10-minute rest on the wire rack is non-negotiable for “gluing” the crust to the meat.
“The chicken is dark brown but raw inside.”
Your oil is too hot. If the oil is over 375°F, the outside will burn before the heat can penetrate the center. Use a thermometer and adjust your stove heat accordingly.
“The chicken is greasy.”
Your oil is too cold. If the oil is below 325°F, the chicken will sit in the oil and absorb it like a sponge rather than searing the exterior.
Perfect Pairings: What to Serve with Your Tenders
A restaurant-style meal is all about the sides. To turn these tenders into a feast, consider these classics:
- Creamy Coleslaw: The acidity of a vinegar-based or creamy slaw cuts through the richness of the fried chicken.
- Truffle Fries: Toss frozen or homemade fries with truffle oil and parmesan cheese while they are hot.
- Honey Cornbread: Sweet cornbread provides a lovely contrast to the smoky, savory BBQ sauce.
- Garlic Smashed Potatoes: Use red potatoes, keep the skins on, and fold in roasted garlic and heavy cream.
The Psychology of the “Comfort Food” Experience
Why are chicken tenders so beloved? Psychologists suggest it’s the combination of “high palatability” factors: salt, fat, and crunch. It’s also a “safe” food—something that provides a consistent sensory experience. When you make these at home, you aren’t just making dinner; you’re crafting a nostalgic experience.
Using high-quality ingredients like organic chicken and homemade sauce elevates this from “fast food” to “gourmet comfort.” It satisfies the craving for indulgence while providing the peace of mind that comes with knowing exactly what went into your food.
Storage and Reheating Tips
If you have leftovers (a rare occurrence!), you want to preserve that crunch.
- Storage: Store in an airtight container in the fridge for up to 3 days.
- Reheating: Never use the microwave—it will make the chicken rubbery and the breading soggy. Instead, use a toaster oven or air fryer at 350°F for 5 minutes. This will re-crisp the oil in the breading and bring back the original texture.
Final Thoughts: The Joy of the Homemade Crunch
Making restaurant-style chicken tenders with smoky BBQ sauce is a labor of love, but the results are undeniably worth it. By focusing on the buttermilk brine, the cornstarch-enriched dredge, and the temperature-controlled fry, you can create a meal that rivals any top-tier eatery.
The smoky BBQ sauce, with its layers of molasses, vinegar, and liquid smoke, acts as the perfect partner, providing a tangy, sweet, and robust finish to every bite. This recipe isn’t just about feeding people; it’s about the joy of the perfect crunch and the satisfaction of mastering a culinary classic.
So, gather your ingredients, prep your dredging station, and get ready to serve the best chicken tenders your kitchen has ever seen. Your family—and your taste buds—will thank you.
Comprehensive Ingredient Breakdown for the Enthusiast
For those who want to know the “why” behind every ingredient, let’s take a deeper look.
The Role of Spices
- Smoked Paprika: Unlike regular paprika, which is mostly for color, smoked paprika (Pimentón) adds a deep, woody flavor that complements the BBQ sauce.
- Garlic and Onion Powder: These provide a “base” savory note. Fresh garlic can burn in high-heat frying, which is why powder is preferred in the dredge.
- Cayenne Pepper: Even if you don’t like heat, a tiny pinch of cayenne acts as a flavor enhancer, making the other spices “pop.”
The Liquid Smoke Debate
Some purists avoid liquid smoke, but in a BBQ sauce meant to mimic hours in a pit, it is an essential shortcut. It is made by condensing the smoke from burning wood into a liquid form. A little goes a long way—use it sparingly to avoid a medicinal taste.
Molasses and Brown Sugar
The BBQ sauce uses both for a reason. Brown sugar provides the immediate sweetness, while molasses provides the dark, complex, bitter-sweet undertones that define a “smoky” sauce.
Creating a Dipping Flight
If you’re hosting a party, why stop at BBQ sauce? You can create a “Dipping Flight” by serving the Smoky BBQ Sauce alongside:
- Spicy Ranch: Mix ranch dressing with sriracha and dried dill.
- Honey Mustard: Equal parts Dijon mustard, yellow mustard, and honey.
- Creamy Blue Cheese: For those who like a funkier, tart contrast to the fried chicken.
By providing a variety of sauces, you turn a simple meal into an interactive dining experience.
Frequently Asked Questions
Q: Can I use gluten-free flour? A: Yes! A 1-to-1 gluten-free flour blend usually works well. Make sure to still use cornstarch (which is naturally gluten-free) to ensure the crunch.
Q: Is it okay to use frozen chicken? A: You can, but ensure the chicken is completely thawed and patted dry before it goes into the buttermilk brine. Excess water from frozen chicken can dilute the brine.
Q: What oil is best for frying? A: Peanut oil is the gold standard for frying chicken because of its high smoke point and neutral flavor. However, if there are allergy concerns, canola or vegetable oil are excellent alternatives.
Q: How do I know when the sauce is done? A: The sauce should “coat the back of a spoon.” If you run your finger through the sauce on the spoon and the line stays clear, it’s thick enough.
Summary of Success
- Brine for at least 4 hours.
- Add cornstarch to your flour.
- Drizzle brine into the flour for craggy bits.
- Rest the breaded chicken for 10 minutes.
- Maintain oil at 350°F.
- Cool on a wire rack.
With these steps, you are no longer just a home cook; you are a master of the chicken tender. Enjoy the process, and more importantly, enjoy the meal!