
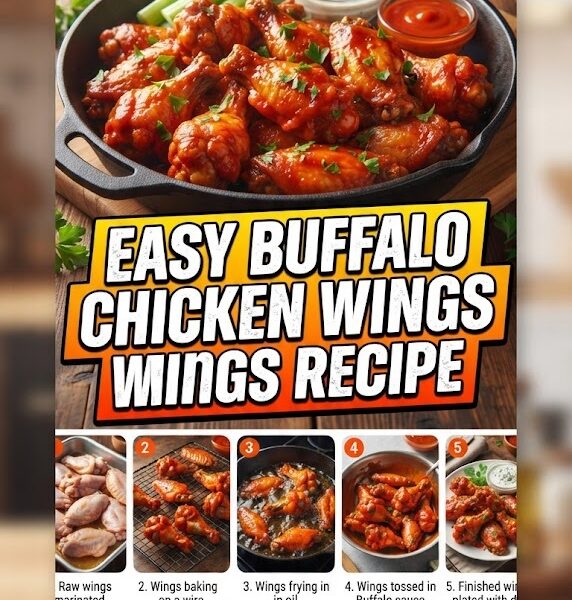
The quest for the perfect chicken wing is a culinary journey that has captivated home cooks and professional chefs alike for decades. We all crave that specific sensory experience: a skin so crisp it shatters like parchment paper, giving way to succulent, tender meat that falls off the bone, all coated in a sauce that balances heat, tang, and sweetness.
For years, the consensus was that the only way to achieve this level of “crunch” was through deep-frying. However, deep-frying at home is often a messy, oily, and high-calorie affair. Enter the revolution of the Baked Chicken Wing. With the right scientific approach and a few pantry staples, you can achieve results in your standard kitchen oven that rival—and often surpass—your favorite sports bar’s deep-fried offerings.
In this comprehensive guide, we will break down the science of the crunch, the essential techniques for preparation, and the ultimate recipe for crispy baked chicken wings that will change your game-day hosting forever.
The Science of the Crunch: Why Baking Powder is the Secret Weapon
To understand how to get crispy skin in an oven, we have to understand the chemistry of chicken skin. Chicken skin is composed of fat, water, and collagen. To get it crispy, we need to do three things simultaneously: render the fat, evaporate the moisture, and break down the collagen.
The “holy grail” of crispy baked wings is the Baking Powder Method. This isn’t just a kitchen myth; it is a chemical reaction that mimics the effects of a deep fryer.
How Baking Powder Works
When you coat chicken wings in a mixture of salt and aluminum-free baking powder, several things happen:
- pH Alteration: Baking powder is alkaline. Raising the pH level of the chicken skin allows the proteins to break down more efficiently, resulting in a texture that browns more deeply and crisps up faster.
- CO2 Production: As the baking powder heats up, it creates tiny carbon dioxide bubbles. these bubbles increase the surface area of the skin, creating those little “nooks and crannies” that become extra crunchy.
- Moisture Extraction: Combined with salt, the baking powder draws moisture to the surface where it can evaporate quickly in the heat of the oven.
Note: It is crucial to use aluminum-free baking powder. Regular baking powder can sometimes leave a metallic aftertaste when used in the quantities required for this recipe.
Preparation: The Foundation of the Perfect Wing
You cannot achieve greatness with a damp wing. If there is one rule to live by in the world of poultry, it is this: Moisture is the enemy of crispiness.
Step 1: Thawing and Drying
If you are using frozen wings, ensure they are completely thawed in the refrigerator. Once thawed, or if using fresh wings, use paper towels to pat them dry. Don’t just give them a quick wipe—press down on them. You want the skin to feel tacky, not wet.
Step 2: The “Air-Chilling” Technique
For those who want to take their wings to the professional level, consider the “dry brine” or air-chilling method. Place your patted-dry wings on a wire rack over a baking sheet and leave them uncovered in the refrigerator for 4 to 24 hours. This cold, dry air circulates around the wings, further dehydrating the skin before they ever touch the oven.
Step 3: Room Temperature
Before seasoning, let your wings sit at room temperature for about 20 minutes. This ensures even cooking and prevents the internal temperature from being too cold when they hit the heat.
The Ultimate Crispy Baked Chicken Wing Recipe
This recipe focuses on the base technique. Once you master the “naked” crispy wing, you can toss them in any sauce your heart desires.
Ingredients
- Chicken Wings: 3 lbs (flats and drumettes separated).
- Baking Powder: 1.5 tablespoons (Aluminum-free).
- Kosher Salt: 1 teaspoon.
- Garlic Powder: 1 teaspoon (optional, for base flavor).
- Smoked Paprika: ½ teaspoon (for color).
- Black Pepper: ½ teaspoon.
Equipment
- Large Baking Sheet: To hold all the wings without crowding.
- Wire Cooling Rack: This is essential. It allows hot air to circulate under the wings, ensuring the bottoms don’t get soggy in their own rendered fat.
- Large Mixing Bowl: For tossing.
- Parchment Paper or Foil: To line the bottom of the tray for easy cleanup.
Step-by-Step Instructions
- Preheat and Prep: Preheat your oven to 250°F (120°C). Line a large baking sheet with foil and place a wire rack on top. Spray the rack lightly with non-stick spray.
- The Coating: In a large bowl, whisk together the baking powder, salt, garlic powder, smoked paprika, and pepper.
- Toss: Add the bone-dry chicken wings to the bowl. Toss vigorously until every wing is evenly coated in a thin layer of the powder mixture. It should look like a light dusting.
- The Low Heat Phase: Arrange the wings on the wire rack in a single layer. Do not let them touch; air needs to move between them. Place them on the lower-middle rack of the oven for 30 minutes at 250°F. This low heat helps render the fat slowly without burning the skin.
- The High Heat Phase: Increase the oven temperature to 425°F (220°C). Move the baking sheet to the upper-middle rack. Bake for another 40–50 minutes, rotating the pan halfway through.
- The Finish: The wings are done when they are a deep golden brown and the skin feels hard to the touch of a fork.
- Rest: Let the wings rest on the rack for 5 minutes. This allows the internal juices to redistribute and the skin to fully set into its crispy state.
Flavor Profiles: Moving Beyond Basic Buffalo
While Buffalo is the king of wing sauces, the beauty of a perfectly crispy baked wing is its versatility. Here are five distinct flavor profiles to elevate your wing game.
1. Classic Buffalo Sauce
- The Mix: ½ cup Frank’s RedHot, 1/3 cup melted unsalted butter, 1 tablespoon white vinegar, and a dash of Worcestershire sauce.
- Pro Tip: Emulsify the butter and hot sauce slowly to create a velvety coating that clings to the wings.
2. Garlic Parmesan (Dry Rub or Sauce)
- The Mix: ¼ cup melted butter, 4 cloves of minced garlic, ½ cup finely grated Parmesan cheese, 1 teaspoon dried oregano, and fresh parsley.
- Execution: Toss the hot wings in the garlic butter first, then sprinkle with the cheese so it melts slightly but maintains its texture.
3. Honey Sriracha
- The Mix: 1/3 cup honey, ¼ cup Sriracha, 1 tablespoon soy sauce, and 1 tablespoon lime juice.
- Flavor Profile: This provides a sticky, sweet, and spicy finish that caramelizes beautifully if you pop the wings back in the oven for 2 minutes after tossing.
4. Lemon Pepper (Atlanta Style)
- The Mix: 2 tablespoons melted butter, 1 tablespoon cracked black pepper, and the zest of two lemons.
- The Secret: Add a pinch of citric acid or a squeeze of fresh lemon juice right before serving to brighten the heavy fats of the chicken.
5. Korean BBQ (Gochujang)
- The Mix: 2 tablespoons Gochujang (Korean chili paste), 2 tablespoons soy sauce, 1 tablespoon minced ginger, 1 tablespoon toasted sesame oil, and 2 tablespoons brown sugar.
- Garnish: Top with toasted sesame seeds and sliced scallions.
Essential Tips for Success
To ensure your wings are Google-ranked quality every time you make them, keep these professional tips in mind:
Avoid Crowding the Pan
If the wings are too close together, they will steam instead of roast. Use two baking sheets if necessary. If you see steam rising from the pan rather than the sizzle of fat, your wings are too crowded.
The Importance of the Wire Rack
Never bake wings directly on a flat surface or parchment paper. The bottom of the wing will sit in the rendered fat and become “soggy-fried” rather than crispy. The wire rack is the single most important piece of equipment for this recipe.
High Heat is Your Friend
While the 250°F start is great for rendering fat, the 425°F (or even 450°F in some ovens) finish is what creates the “crack” in the skin. Don’t be afraid of the high heat; chicken wings are high in fat and can handle it without drying out.
Know Your Oven
Every oven has hot spots. If the wings in the back left corner are browning faster than the ones in the front, rotate the pan 180 degrees halfway through the high-heat cycle.
Oven vs. Air Fryer: Which is Better?
The rise of the air fryer has led many to abandon the oven. However, both have their merits.
- The Air Fryer: It is essentially a small, high-powered convection oven. It is excellent for cooking small batches (10–15 wings) very quickly. The skin gets incredibly crispy because the air circulation is so concentrated.
- The Oven: The oven is superior for feeding a crowd. You can cook 50+ wings at once on two large baking sheets. With the baking powder method and a wire rack, the oven can achieve 95% of the crispiness of an air fryer with much higher volume capacity.
The Art of the Dip: Homemade Accompaniments
A wing is only as good as the dip that follows it. Skip the bottled stuff and make these three staples at home.
1. Real Blue Cheese Dressing
- 1/2 cup sour cream
- 1/4 cup mayonnaise
- 1/2 cup crumbled high-quality blue cheese (like Gorgonzola or Roquefort)
- 1 tablespoon lemon juice
- 1 clove minced garlic
- Salt and plenty of black pepper
- Method: Mash half the blue cheese into the cream base to flavor the whole sauce, then fold in the remaining chunks for texture.
2. Buttermilk Ranch
- 1/2 cup buttermilk
- 1/2 cup mayonnaise
- 1 tablespoon fresh chives, minced
- 1 tablespoon fresh dill, minced
- 1/2 teaspoon onion powder
- Method: Let it sit in the fridge for at least an hour before serving to let the herb flavors develop.
3. Spicy Miso Mayo
- 1/2 cup Kewpie mayonnaise
- 1 tablespoon white miso paste
- 1 teaspoon Sriracha
- Method: This is the perfect pairing for Korean or Japanese-style wings.
Common Mistakes to Avoid
Even seasoned cooks can stumble when it comes to chicken wings. Watch out for these pitfalls:
- Using Baking Soda instead of Baking Powder: This is a common and disastrous mistake. Baking soda has a very strong, soapy, and unpleasant alkaline taste. It will ruin the wings. Always check the label for Baking Powder.
- Not Using Enough Salt: Chicken skin is thick and fatty; it needs a generous amount of salt to penetrate the meat and season the skin.
- Applying Sauce Too Early: If you sauce the wings and then put them back in the oven for a long time, the sugars in the sauce will burn, and the moisture in the sauce will make the skin soggy. Sauce should be applied in the last 2–3 minutes or immediately after taking them out.
- Buying “Jumbo” Wings: While they look impressive, jumbo wings often have a higher meat-to-skin ratio and more fat to render, which can make it harder to get them perfectly crispy without overcooking the meat. Medium-sized wings are usually the sweet spot.
Dietary Considerations and Substitutions
While the classic recipe is naturally gluten-free (if using GF baking powder), here are some variations:
- Keto Friendly: This recipe is inherently keto-friendly as it uses no flour or sugar in the base. Just ensure your sauces are sugar-free.
- Paleo/Whole30: Instead of baking powder, you can use a light dusting of arrowroot starch or tapioca flour. It won’t have the same chemical reaction as baking powder, but it helps absorb moisture for a decent crunch.
- Low Sodium: If you are watching your salt intake, skip the salt in the dusting and use more aromatics like onion powder, smoked paprika, and dried oregano to provide flavor without the sodium.
Frequently Asked Questions (FAQ)
Why are my wings still soggy?
The most likely culprit is moisture. Either the wings weren’t dried properly with paper towels, or the oven wasn’t hot enough. Also, ensure you aren’t using a “crowded” pan which causes steaming.
Can I use this method for chicken thighs?
Yes! You can use the baking powder method for bone-in, skin-on chicken thighs. However, since thighs are larger, they will need a longer “low heat” phase to render the larger amount of fat found in the skin.
Do I need to flip the wings?
If you are using a wire rack, flipping isn’t strictly necessary because the air circulates all around. However, flipping them halfway through the high-heat phase can ensure the absolute most even browning possible.
How do I reheat leftover wings?
Never use a microwave; it will turn the skin into rubber. The best way to reheat is in the oven at 350°F on a wire rack for about 10 minutes, or in an air fryer for 3–4 minutes.
The Perfect Game-Day Presentation
When serving wings, presentation adds to the experience.
- The Platter: Use a large wooden board or a white ceramic platter.
- The Veggies: Classic celery and carrot sticks aren’t just for show; they provide a cool, crunchy contrast to the hot, fatty wings.
- The Bowls: Place your dipping sauces in small ramekins and scatter fresh herbs (like cilantro or parsley) over the wings for a pop of color.
- The “Bone Bowl”: Always provide a secondary bowl for discarded bones. It keeps the eating area clean and organized.
Conclusion
Mastering the baked chicken wing is about understanding the balance between moisture, heat, and chemistry. By utilizing the baking powder method and the two-stage temperature approach, you can create a restaurant-quality appetizer in the comfort of your own kitchen. Whether you’re preparing for the Super Bowl, a backyard BBQ, or just a Tuesday night craving, these crispy baked wings stand as a testament that you don’t need a deep fryer to achieve culinary perfection.
Experiment with the sauces, perfect your drying technique, and soon you’ll be known as the wing master of your social circle. There is no longer a need to choose between healthy and delicious—with this method, you truly get the best of both worlds.